Meet Mike in Fredericksburg next weekend!
Mike McGrath will appear Saturday, March 17 and Sunday, March 18 at the Fredericksburg Home & Flower Show at the Expo Center in Fredericksburg, Virginia. Saturday’s times are at noon and 3 p.m., Sunday’s are at noon and 2 p.m. This is his only springtime appearance on the Virginia side of the D.C. area.
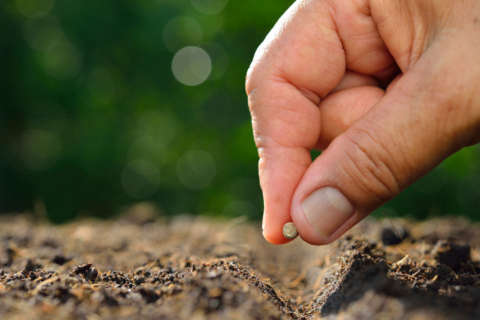
It’s (almost) time to start your seeds!
Proper seed starting is a topic I feel obligated to cover thoroughly every season, and this is the perfect time of year to do so.
So, let’s reach back a season and update advice given to Bob, who catches our signal out near Hagerstown, Maryland. Last spring, he wrote: “Some of the plants I’ve been starting from seed are getting tall and leggy. I’m about to restart some varieties for the third time due to this problem.”
The essence of comedy — and seed starting — is timing.
It sounds like Bob was starting his seeds way too early.
Forget trying to time things around your area’s “last average frost date.” Tropical plants such as tomatoes and peppers can be set back severely if they’re exposed to nights in the mid to high 30s (and even the low 40s). These and other summer plants should not go outside until nighttime temps are reliably in the 50s. That’s generally around May 15 or later in these parts.
But don’t go by the calendar either! Check the long-range forecast before you take your baby plants outside, and be prepared to keep them indoors a bit longer if any upcoming nights are expected to drop anywhere near or below 40.
Time it like this: You want your plants to be about 6 weeks old when they go outside, ideally around May 15. Add a week up front for the actual germination of the seeds and a few more days for wiggle room at the end, and we’re talking about a reasonable seed-starting start date of March 15 or so.
Heating mats are only for germination, not growing
Bob continues: “I put the seeds in containers and give them a bit of water. Then, the trays of seeds go underneath lights on a Grow Rack. I also have heating mats under the trays.”
Two things out of balance here:
- Seeds that have not yet germinated don’t need light. (They’re underground!) It won’t hurt them, but it’s unnecessary.
- Heating mats are great for providing the exact amount of bottom heat that helps seeds germinate quickly. But after the seeds are up and sprouted, the mats should be turned off or they’ll keep the soil too warm and weaken the plants. (The seeds need warm soil to sprout, but after they’re up and growing, the plants flourish with an indoor air temp in the 60s.)
Once your seeds have sprouted, the thing that your young plants want the most is bright light and lots of it — and that’s where most seed-starters fail.
Lights, lights and more lights!
Bob out by Hagerstown reported that his plants from seed were coming up tall and leggy. That’s a very common problem, because young plants need much brighter light than most people suspect.
The worst kind of light comes from a so-called “sunny windowsill” (a phrase that is actually Latin for “plants that should play pro basketball”). The windowsill probably isn’t all that sunny to begin with, and it probably gets darn chilly at night.
Four-foot-long fluorescent tubes (as in a basic shop light fixture), are great for helping baby plants grow up short and stocky, but most people don’t keep the plants close enough to the lights. Use hanging chains to adjust the height of the fixture upward, or place books underneath the plants so that you can remove some as the plants get taller. But always keep the tips of your baby plants within an inch of the tubes.
That’s right: an inch.
The light intensity (lumens) of fluorescent lighting drops off dramatically after even a short distance. And fluorescent light is cool, so the plants aren’t harmed by being so close. (Tips touching the tubes is better than those tips being 3 inches away.)
Oh, and while a two-tube shop light is great, a four-tube fixture will give you “garden center” quality plants!
Update: New LEDs in the size and shape of T-8 fluorescents (the modern, skinnier types) are now widely available, and their packaging said that they work in old-school fluorescent fixtures. These LEDs will cost much less to run and give off just as much light — and that light should remain just as bright year after year. (Old-school fluorescents lose a lot of light intensity after their first year.)
Seed starting 101
- Fill the same kind of small plastic containers that garden centers use (no old egg cartons!) with a light, loose bagged seed-starting mix (aka “soil-free mix,” “professional mix” or “potting mix”). Do not use garden soil!
- Avoid bagged soils that contain chemical fertilizer (“feeds plants for six months!”) or those creepy water-holding crystals. You may have to search a bit for a clean seed-starting mixture, but independent garden centers should carry a nice selection. (If they don’t, yell at them. And mention my name.)
- Sit the “soil”-filled containers in a sink of water until they’re heavy and saturated.
- Place two seeds in each container.
- Cover the seeds with a little bit more mix.
- Cover the containers with clear plastic wrap and put them on a heating mat or just a warm table in your home.
- If a few days pass and no water drops are apparent on the inside of the plastic wrap, lift it up, mist the surface with plain water and then recover the containers.
- When the very first sprouts appear, immediately remove the wrap. (The remaining plants will pop up over the next day or two.)
- Turn off any extra heat underneath and immediately get the baby plants under bright light; an inch away from brand-new, 4-foot-long fluorescent (or LED) tubes is ideal. Run the lights for 16 hours a day.
- Gently feed the plants with compost tea or worm castings when they’re around 4 weeks old.
- If more than one plant has sprouted in any of the cells, use small scissors to cut the tallest or weakest looking one off at the soil line at the three- or four-week mark. Don’t yank it out. And don’t let it continue to grow; it will diminish the health of the good plant.
Be warned: Seed starting is harder than gardening
And finally, don’t despair if your seed-starting attempts yield poor results the first year or two.
Nobody gets seed-starting right first time off the bat. It is so much harder to raise little plants from seed indoors than to nurture big plants outdoors; the skill set is totally different. And the only way to get really good at it is to try — and fail — a couple of times.
So, do your best to follow the detailed instructions above. But be prepared to buy replacement plants without shame in the spring. You don’t want to start the season with weak, sickly plants. And you’ll be sure to do much better at your seed starting the following year! (“The only true path to success is paved with failure and persistence.”)